This website may contain affiliate links and advertising so that we can provide recipes to you. Read my disclosure policy.
These vibrant red velvet Oreos are filled with a sweet cream cheese frosting and are irresistibly cute! Super easy to make from a red velvet cake mix, but SO delicious that no one will ever know.
Red velvet desserts are my love language! I love the mild chocolate flavor. I also love that red velvet often involves cream cheese frosting! It’s the best of both worlds. Try these cupcakes, this incredible cheesecake, or my red velvet brownies!

Red Velvet Oreo Cookies
Decadent cream cheese frosting sandwiched between two chewy red velvet cookies. It’s a match made in heaven and delicious in EVERY way! If you’ve ever made homemade Oreo cookies before you’re going to love this recipe! It’s a delicious twist with red velvet flavors. The red velvet cake mix makes it super easy and they come out super soft and chewy. Every bite is a delight, and they’re also a fun and festive treat to serve. Perfect for holiday parties at Valentine’s and Christmas!
Red velvet has a signature flavor. The foundation uses a small amount of cocoa powder, but it gets its vibrant red color from food coloring. I love a good red velvet cake recipe! And any cream cheese frosting paired with red velvet desserts is a win in my book. It adds a sweet overall tang that compliments the flavors perfectly. But if you’re looking for a cake recipe with more chocolate flavor, try my classic chocolate cake!
Ingredients in Red Velvet Oreos
The best part of these delicious red velvet cookies is how simple they are. This recipe uses a boxed cake mix to make the dough…and it doesn’t get any easier than that! Check out the recipe card at the bottom of the post for exact measurements.
Cookies
- Cake Mix: Use 1 box of your favorite red velvet cake mix.
- Baking Powder: Give the cookies a little lift when baking.
- Vegetable Oil: The oil makes the cookies soft and moist!
- Eggs: Use large, room-temperature eggs.
Cream Cheese Filling
- Cream Cheese: This should also be softened to room temperature because it will mix better. The cream cheese adds a creamy tanginess to the frosting.
- Butter: Use unsalted butter that has been softened to room temperature.
- Vanilla Extract: This will add a sweet flavor to mix in with the tangy cream cheese.
- Powdered Sugar: You use powdered sugar instead of granulated sugar because it dissolves into the frosting making it nice and smooth.
- Milk: I used 2% but any milk works! Use more if the frosting is too thick.
Red Velvet Oreos Recipe
Making homemade red velvet Oreos is a lot easier than you would think! These are simple and come together quickly, making them a great go-to dessert to impress any guest! It’s also fun to let the kids help you make them!
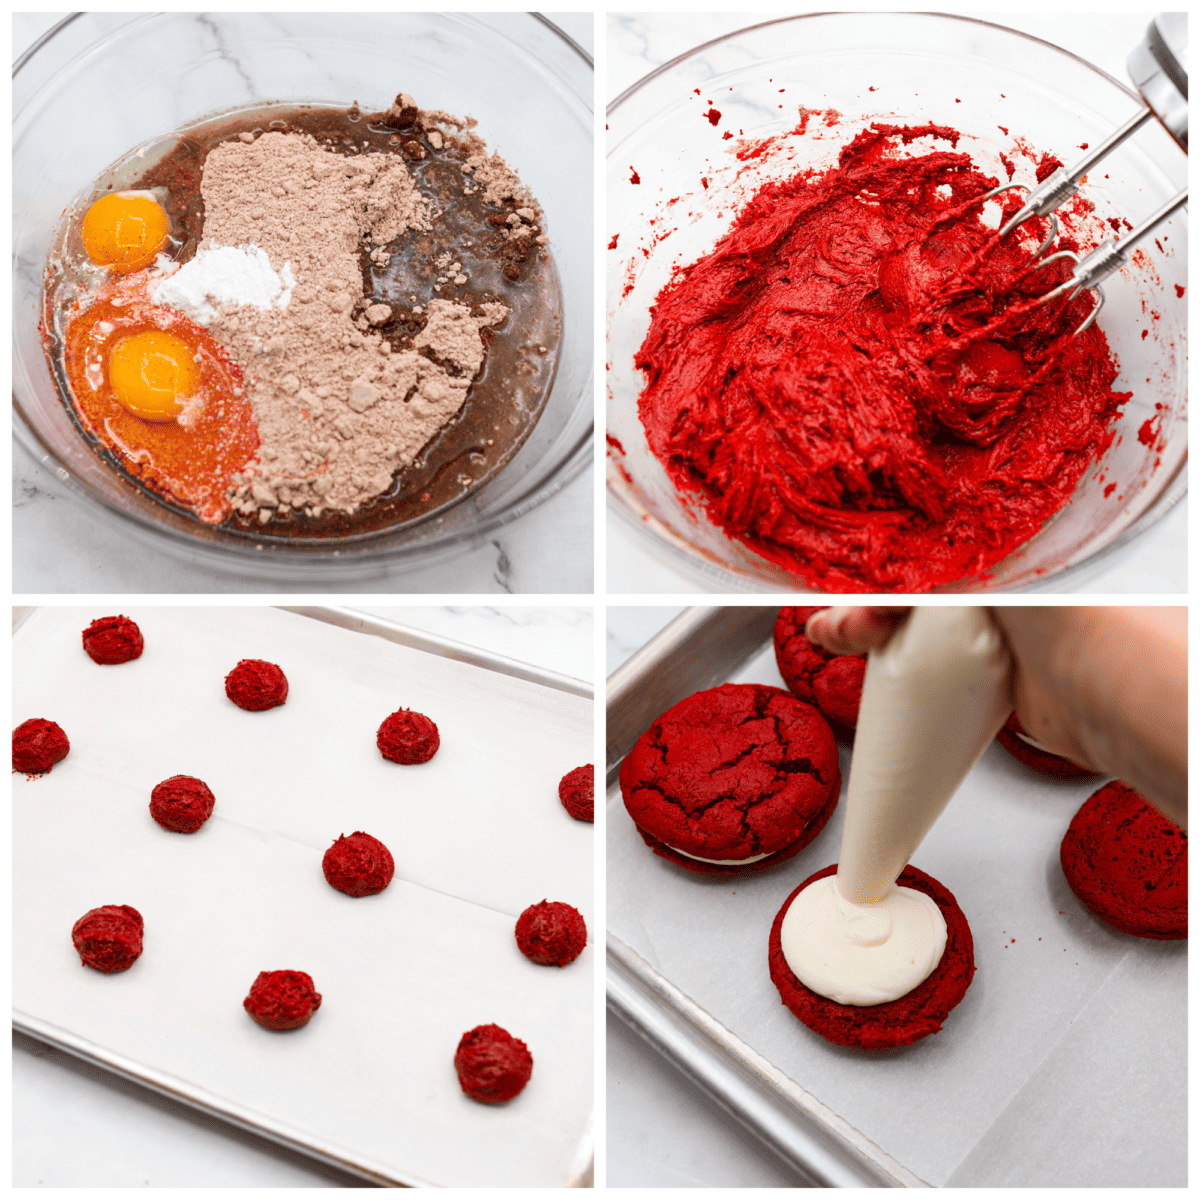
- Preheat Oven, Prepare Pan: Preheat the oven to 350 degrees Fahrenheit and line 2 baking sheets with parchment paper. Set aside.
- Combine and Mix Ingredients: In a large bowl, mix the cake mix, baking powder, oil, and eggs on medium speed until combined.
- Scoop Dough: Use a medium cookie scoop to scoop about 2 tablespoons of dough onto the prepared baking sheets, leaving 2 inches between them.
- Bake: Bake for 10-12 minutes. The edges will look set but the middle will look underbaked, and that’s okay! They will continue baking as they cool on the tray. Let them cool on the tray for 4 minutes before transferring to a cooling rack to finish cooling.
Cream Cheese Filling
- Cream the Cream Cheese and Butter: Add the cream cheese and butter to a large bowl and beat with a hand mixer on medium-high speed until combined.
- Add Vanilla, Powdered Sugar, and Milk: Scrape down the sides and bottom of the bowl and add the vanilla, powdered sugar, and milk.
- Beat Until Smooth: Mix on low speed until the sugar is absorbed before increasing the speed to medium. Beat until smooth and fluffy.
- Add Filling, Assemble Cookies: Spread or pipe a tablespoon of frosting onto the bottom of one cookie then sandwich another cookie on top. Pressing just enough for the filling to meet the edge of the cookies. Repeat with the remaining cookies. You should end up with 18 completed sandwich cookies.

Red Velvet Oreo Tips
Follow my tips and ideas below when making these red velvet Oreos! You’ll love how fast they come together. They are the perfect cookie to make when you’re short on time.
- Cake Mix: Use a different cake mix! Obviously, that means the cookies won’t be red velvet, but the recipe will work just as well with a spice cake, carrot cake, or any other cake mix you desire! You could make lemon Oreos by using lemon cake mix and adding a tablespoon of lemon zest to the frosting.
- Don’t OVERBAKE! Do NOT overbake these cookies!! You might be tempted to give them a few extra minutes because they WILL look raw and doughy coming out of the oven, but don’t do it! These cookies continue to set up as they cool. If you want soft, chewy cookies and not hard, crunchy cookies, don’t overbake them!
- Tip to Soften Cookies: If your cookies do end up on the hard side, store the unfrosted cookies in a plastic bag or an air-tight container with a couple of slices of sandwich bread overnight and they should soften up. They will also soften a bit after they have been filled with frosting and stored in the refrigerator overnight.

Storing Leftover Cookies
These darling red velvet Oreos are irresistible, so I highly doubt you will have leftovers. But if you do, follow my tips below!
- On the Counter: Place assembled red velvet cookies in an airtight container. Leave on the counter at room temperature for up to 3 days.
- In the Refrigerator: Store leftover cookies in an airtight container in the refrigerator for up to 5 days.
- Make in Advance: Make them a day or two in advance so the filling has time to soak into the cookies. The cookies get soft and decadent! You can also store them unassembled if you prefer. Keep the filling in the fridge and the cookies in an airtight container. Assemble them right before serving!

More Delicious Cake Mix Desserts
Pin this now to find it later
Pin It
Cream Cheese Filling
Cookies
-
Preheat the oven to 350 degrees Fahrenheit and line 2 baking sheets with parchment paper. Set aside.
-
In a large bowl, mix the cake mix, baking powder, oil, and eggs on medium speed until combined.
-
Use a medium cookie scoop to scoop about 2 tablespoons of dough onto the prepared baking sheets, leaving 2 inches between them.
-
Bake for 10-12 minutes, until the edges are set. The middle will look underbaked, but that’s okay! They will continue baking as they cool on the tray. Let them cool on the tray for 4 minutes before transferring to a cooling rack to finish cooling.
Cream Cheese Filling
-
Add the cream cheese and butter to a large bowl and beat with a hand mixer on medium-high speed until combined.
-
Scrape down the sides and bottom of the bowl and add the vanilla, powdered sugar, and milk.
-
Mix on low speed until the sugar is mostly absorbed before increasing the speed to medium. Beat until smooth and fluffy.
-
Spread or pipe a tablespoon of frosting onto the bottom of one cookie then sandwich another cookie on top. Pressing just enough for the filling to meet the edge of the cookies. Repeat with the remaining cookies. You should end up with 18 completed sandwich cookies.
Calories: 243kcalCarbohydrates: 31gProtein: 2gFat: 13gSaturated Fat: 4gPolyunsaturated Fat: 4gMonounsaturated Fat: 4gTrans Fat: 0.1gCholesterol: 31mgSodium: 246mgPotassium: 119mgFiber: 1gSugar: 23gVitamin A: 192IUCalcium: 56mgIron: 1mg
Nutrition information is automatically calculated, so should only be used as an approximation.


