This website may contain affiliate links and advertising so that we can provide recipes to you. Read my disclosure policy.
These 1-hour dinner rolls are the perfect solution for making fresh bread in a pinch! This easy and delicious roll recipe will become your new favorite, just in time for the holidays!
Homemade dinner rolls are a necessity for the holidays! For a roll on the sweeter side try my amazing Hawaiian sweet rolls. These copycat Texas Roadhouse rolls are always a hit! Or for that perfect in-between buttery goodness, go for my perfect dinner rolls.

Easy 1-Hour Dinner Rolls
This time of year has so much going on. Preparing Thanksgiving is a feat in itself. Making tasty rolls to go with your dinner shouldn’t have to be! These 1-hour dinner rolls are the solution for that tasty homemade flavor without all the prep time! Honestly, this recipe has been pretty life-changing. I LOVE the flavor and texture of homemade rolls but it can get pretty time-consuming. Good news! With just a little rapid-rise yeast and simple ingredients, you can recreate the soft, buttery texture of fresh rolls with just 40 minutes of prep time!
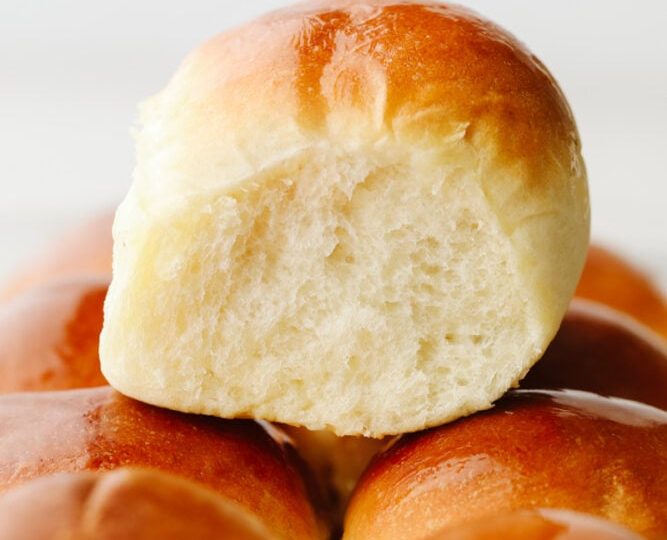
This is a great place to start for easing into the world of baking bread. Getting the perfect dough and working with yeast can sometimes be a bit tricky! This 1-hour dinner roll recipe takes the guesswork and long proofing times away with the use of rapid-rise yeast and just a few simple instructions. You’re going to love how they turn out! 1-hour dinner rolls are soft and buttery with the perfect chew. Perfect for any dinner, dipping in some tomato soup, or even for enjoying with a little honey butter or jam.
Ingredients For 1-Hour Dinner Rolls
No grocery trip is required here! 1-hour dinner rolls are amazing because they use super simple ingredients. With just a few staples like butter, milk, and all-purpose flour, you’ll create something tastier than anything you can get from the store! All individual measurements are in the printable recipe card below.
- All-Purpose Flour: All-purpose flour works great for achieving that light, fluffy bread texture.
- Granulated Sugar: Needed for activating your yeast!
- Rapid Rise Yeast: Be doubly sure you’ve got rapid rise yeast and not active dry yeast. This will change the conditions necessary to make your dough.
- Salt: Salt is added to enhance the rolls’ overall flavor.
- Milk: Milk is a vital part of your dough and makes your rolls more tender. You can use any kind of milk here! Even dairy-free options like oat milk, almond milk, or cashew milk.
- Unsalted Butter: Added to dough for a rich flavor and soft texture. Additionally, butter is needed to melt and brush on top! This gives your rolls that bakery-worthy shine.

How to Make 1-Hour Dinner Rolls
The steps to make these 1-hour rolls are really straightforward. You’ll have hot, buttery rolls fresh from the oven in no time! It’s the perfect recipe whether it’s your first time making them or you’re a seasoned cook! Honestly, all they need from you is a little love. The simple ingredients will do the rest!
Preparing Dough
- Preheat Oven/ Prepare the Pan: Let’s make some tasty rolls! First, set your oven to warm. Or as low as you can set it if you don’t have a warm option, about 170 degrees Fahrenheit. Lightly spray a 9×13 pan with non-stick cooking spray then set aside.
- Prepare Yeast Mixture: In the bowl of your stand mixer, whisk together the flour, sugar, yeast, and salt.
- Combine with Milk and Butter: In another bowl, combine the warm milk and 4 tablespoons of melted butter. Using the dough hook on low, slowly add the liquid to the dry ingredients. Knead the dough for about 4 minutes or so, until it is smooth and elastic. If the dough is still very sticky, add more flour 1-2 tablespoons at a time.
- Rest: Once you have achieved a smooth dough, cover the bowl then let rest for about 5-10 minutes.
- Divide: Once the dough has rested, turn it out onto a lightly floured surface and divide the dough as evenly as you can into 15 pieces. I like to use a kitchen scale so I can get them equal in size. Weigh the whole ball of dough in grams then divide it by 15. That’s the weight each roll should be. Shape each piece into a ball and pinch the dough together on the bottom.
Baking
- Let Rise in the Oven: Next, place the dough balls into the baking pan and use your fingers to rub a little bit of water over the tops of the balls so they don’t dry out while baking. Then, transfer to the warm oven and let rise for 20 minutes, or up to 30 minutes if they have not doubled in size after 20. I find it helpful to use a spray bottle to spray the bottom of the oven to create steam to help the rolls rise faster.
- Bake: Remove the risen rolls from the oven and bump the heat up to 375 degrees Fahrenheit. As soon as the oven has preheated, bake the rolls for 16-18 minutes, until the tops are golden brown. Brush with melted butter as soon as they come out of the oven.

Tips For the Best 1-Hour Dinner Rolls
Here are some tips and tricks for making buttery soft rolls! 1-hour dinner rolls are so incredibly delicious and they’re sure to be a hit at Thanksgiving. This recipe is definitely a keeper!
- Watch Temperatures: You’ve got to make sure the temperature of your milk isn’t too high when adding it to your yeast mixture. The sweet spot is about 100 degrees Fahrenheit. If you add liquids that are too hot, they will kill your yeast and you’ll have to start the whole process over.
- Lemon Juice: Yeast grows best in a slightly acidic environment. Adding a few drops of lemon juice can help it rise!
- Adding Flavors: These rolls are a blank canvas you can add your favorite flavors! I love adding fresh herbs and some of my Italian seasoning to the dough for an aromatic finish. You could also add a teaspoon of garlic powder or grated cheddar for a cheesy variety. For a sweeter variety of this recipe, add honey or pineapple juice!
- Other Uses: Besides being an amazing dinner side, these yummy rolls make a great foundation for sliders and sandwiches!

Storing Leftover Rolls
Just like so many other holiday recipes, 1-hour dinner rolls make great leftovers! Eat them with butter and jam, or use them for sliders! It’s the perfect weeknight snack!
- At Room Temperature: These rolls will keep for up to 5 days. I like to store them in a large bowl covered with plastic wrap because it keeps them from drying out quickly.
- Making Ahead: Are you worried about Thanksgiving prep being too hectic? You can make these rolls in advance! After you have shaped your rolls, then place them on your baking sheet. Wrap them tightly then store them in the refrigerator. You can keep them there for up to 2 days. Allow them to come to room temperature before baking.

More Homemade Roll Recipes
Once you start making your rolls from scratch, you won’t go back! I’ve rounded up some of my all-time favorite roll recipes for you to try! There’s a recipe for every occasion and craving. You’re going to love how soft, warm, and flavorful they are!
Pin this now to find it later
Pin It
-
Set the oven to warm or alternately as low as you can set it if you don’t have a warm option, about 170 degrees Farhenheit. Lightly spray a 9×13 pan with pan spray and set it aside.
-
In the bowl of your mixer whisk together the flour, sugar, yeast, and salt.
-
In another bowl combine the warm milk and 4 tablespoons of melted butter. Using the dough hook on low, slowly add the liquid to the dry ingredients. Knead the dough for about 4 minutes or so, until it is smooth and elastic. If the dough is still very sticky, add more flour 1-2 tablespoons at a time.
-
Once you have achieved a smooth dough, cover the bowl and let rest for about 5-10 minutes.
-
Once the dough has rested, turn it out onto a lightly floured surface and divide the dough as evenly as you can into 15 pieces. I like to use a kitchen scale so I can get them equal in size. Weigh the whole ball of dough in grams and then divide it by 15. That’s the weight each roll should be. Shape each piece into a ball and pinch the dough together on the bottom.
-
Place the dough balls into the baking pan and use your fingers to rub a little bit of water over the tops of the balls so they don’t dry out while baking. Transfer to the warm oven and let rise for 20 minutes, or up to 30 minutes if they have not doubled in size after 20. I find it can be helpful to use a spray bottle to spray the bottom of the oven to create steam to help the rolls rise faster.
-
Remove the risen rolls from the oven and bump the heat up to 375 degrees Fahrenheit. As soon as the oven has preheated, bake the rolls for 16-18 minutes, until the tops are golden brown. Brush with melted butter as soon as they come out of the oven.
Originally Posted on November 11, 2021
Calories: 168kcalCarbohydrates: 26gProtein: 4gFat: 5gSaturated Fat: 3gPolyunsaturated Fat: 1gMonounsaturated Fat: 1gTrans Fat: 1gCholesterol: 14mgSodium: 243mgPotassium: 59mgFiber: 1gSugar: 4gVitamin A: 173IUCalcium: 29mgIron: 1mg
Nutrition information is automatically calculated, so should only be used as an approximation.